Photographic Print : Russo-Japanese War - 3rd Army Division at Battle of Shaho

![]()
Photo Prints From Mary Evans Picture Library
Russo-Japanese War - 3rd Army Division at Battle of Shaho
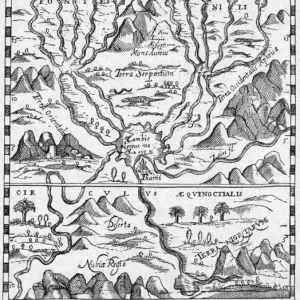
Japanese Commander and his staff of the Third Army at the Battle of Shaho (Saka no kaisen) - the second large-scale land battle of the Russo-Japanese War fought along a 37-mile front centred at the Shaho River along the Mukden Port Arthur spur of the China Far East Railway north of Liaoyang, Manchuria. Date: 1904
Mary Evans Picture Library makes available wonderful images created for people to enjoy over the centuries
Media ID 11584055
© Mary Evans / Grenville Collins Postcard Collection
Arthur Binoculars Forces Hilltop Manchuria Manchurian Mukden Occupation Occupying Position Russo Spur Staff Strategy Viewpoint Saka
12"x8" Photo Print
Introducing the captivating Russo-Japanese War - 3rd Army Division at Battle of Shaho photograph from Media Storehouse, brought to you in collaboration with Mary Evans Prints Online. This evocative image transports us back in time to the pivotal second land battle of the Russo-Japanese War. Witness the intensity of the conflict as Japanese commanders and their staff strategize during the Battle of Shaho, also known as Saka no kaisen. This rights-managed print offers a unique glimpse into the historical event, perfect for history enthusiasts, educators, or anyone seeking to add depth to their collection. Immerse yourself in the past with this stunning, high-quality photograph.
Photo prints are produced on Kodak professional photo paper resulting in timeless and breath-taking prints which are also ideal for framing. The colors produced are rich and vivid, with accurate blacks and pristine whites, resulting in prints that are truly timeless and magnificent. Whether you're looking to display your prints in your home, office, or gallery, our range of photographic prints are sure to impress. Dimensions refers to the size of the paper in inches.
Our Photo Prints are in a large range of sizes and are printed on Archival Quality Paper for excellent colour reproduction and longevity. They are ideal for framing (our Framed Prints use these) at a reasonable cost. Alternatives include cheaper Poster Prints and higher quality Fine Art Paper, the choice of which is largely dependant on your budget.
Estimated Image Size (if not cropped) is 30.4cm x 19.6cm (12" x 7.7")
Estimated Product Size is 30.5cm x 20.3cm (12" x 8")
These are individually made so all sizes are approximate
Artwork printed orientated as per the preview above, with landscape (horizontal) orientation to match the source image.
EDITORS COMMENTS
This evocative photograph captures the Japanese Commander and his staff of the Third Army, strategically positioned on a hilltop overlooking the battlefield during the Battle of Shaho, also known as the Second Battle of Mukden or Saka no Kaisen, in the Russo-Japanese War of 1904. The battle took place along a 37-mile front centered at the Shaho River, north of Liaoyang in Manchuria. The Third Army, a crucial component of the Japanese occupying forces, played a pivotal role in the defense against the advancing Russian forces. The Commander and his officers are seen intently studying the terrain through binoculars, planning their next move as the sun sets over the battlefield. The map spread out before them indicates the strategic importance of their position, with the Mukden Port Arthur spur of the China East Railway visible in the background. The hilltop offers a commanding view of the battlefield, allowing the Japanese forces to anticipate the enemy's movements and adapt their strategy accordingly. The Battle of Shaho was a significant turning point in the Russo-Japanese War, marking the end of the Russian offensive in Manchuria and leading to their eventual defeat. This photograph offers a glimpse into the intense and decisive moments of this historical conflict, providing a fascinating insight into the military tactics and strategies employed during this pivotal time in world history.
MADE IN THE USA
Safe Shipping with 30 Day Money Back Guarantee
FREE PERSONALISATION*
We are proud to offer a range of customisation features including Personalised Captions, Color Filters and Picture Zoom Tools
SECURE PAYMENTS
We happily accept a wide range of payment options so you can pay for the things you need in the way that is most convenient for you
* Options may vary by product and licensing agreement. Zoomed Pictures can be adjusted in the Basket.