
Sham Fight Collection
"The Spectacle of Deception: Unveiling the Sham Fights of Victorian England" In the heart of Chobham, a grand event unfolded as Her Majesty herself graced the scene


All Professionally Made to Order for Quick Shipping
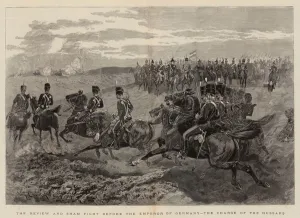
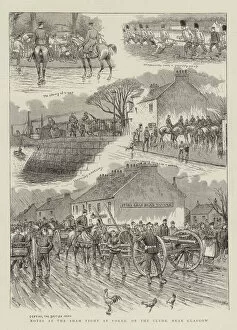
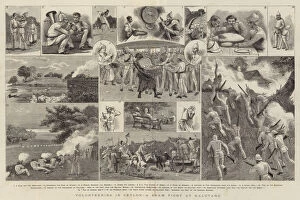
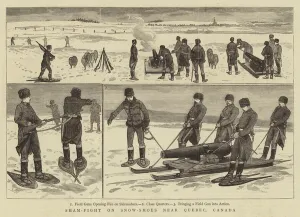
"The Spectacle of Deception: Unveiling the Sham Fights of Victorian England" In the heart of Chobham, a grand event unfolded as Her Majesty herself graced the scene. The Sham Fight at Chobham before Her Majesty was an engraving that captured this extraordinary display. It showcased a meticulously choreographed battle, where soldiers engaged in a simulated combat, showcasing their prowess and military tactics. Not far away, in Portsmouth, another intriguing spectacle took place under cover of darkness. Torpedo Warfare, a Sham Fight by Night at Portsmouth depicted an intense battle scenario involving torpedoes. This captivating engraving highlighted the innovative strategies employed by naval forces to counter potential threats. Portsmouth once again became the center stage for yet another remarkable event – The Naval Review and Sham Fight at Portsmouth before the Colonial and Indian Visitors. This engraving immortalized an impressive demonstration of naval power to dignitaries from distant lands who marveled at Britain's maritime might. Meanwhile, Aldershot witnessed Military Manoeuvres featuring a thrilling Sham Fight that left spectators awestruck. Through this engraved portrayal, viewers were transported into the midst of fierce clashes between opposing forces vying for victory on imaginary battlegrounds. Across borders and beyond seas lay Germany where Emperor Wilhelm II himself hosted The Review and Sham Fight before his eyes. In this dramatic depiction titled "The Charge of Hussars, " one could almost feel the thundering hooves as cavalry charged forward with unwavering determination. Venturing out to sea aboard Channel Squadron ships stationed at Portland came A Sham Fight that enthralled all who beheld it. This enchanting engraving brought alive naval battles fought with great gusto amidst crashing waves—a testament to British seafaring supremacy. Brighton too had its fair share of excitement with The Sham Fight held within its bounds—an enthralling spectacle etched forever in history through engravings capturing every detail down to minute precision.