Fraud Blocker Skip to main content

Hereward The Exile Collection

"Hereward the Exile: A Tale of Courage and Deception" In the epic saga of Hereward the Great

Background imageHereward The Exile Collection: How Hereward departed from Ely, and how he killed the mare, Swallow

How Hereward departed from Ely, and how he killed the mare, Swallow, illustration from Hereward the Great by Charles
STC400817 How Hereward departed from Ely, and how he killed the mare, Swallow, illustration from Hereward the Great by Charles Kingsley, pub. 1870, engraved by C.G

Background imageHereward The Exile Collection: How Hereward got the rest of his souls price, illustration from Hereward the Great by Charles

How Hereward got the rest of his souls price, illustration from Hereward the Great by Charles Kingsley, pub
STC400819 How Hereward got the rest of his souls price, illustration from Hereward the Great by Charles Kingsley, pub. 1870, engraved by C.G

Background imageHereward The Exile Collection: How Hereward played the potter and cheated the King, illustration from Hereward the Great

How Hereward played the potter and cheated the King, illustration from Hereward the Great
STC400816 How Hereward played the potter and cheated the King, illustration from Hereward the Great by Charles Kingsley, pub. 1870, engraved by C.G

Background imageHereward The Exile Collection: How Torfrida teaches Hereward to pray, illustration from Hereward the Great by Charles

How Torfrida teaches Hereward to pray, illustration from Hereward the Great by Charles
STC400813 How Torfrida teaches Hereward to pray, illustration from Hereward the Great by Charles Kingsley, pub. 1870, engraved by C.G

Background imageHereward The Exile Collection: Alftruda recognises Hereward, illustration from Hereward the Great by Charles Kingsley

Alftruda recognises Hereward, illustration from Hereward the Great by Charles Kingsley
STC400811 Alftruda recognises Hereward, illustration from Hereward the Great by Charles Kingsley, pub. 1870, engraved by C.G

Background imageHereward The Exile Collection: How Hereward enters the consecrated fortress of St. Bertin

How Hereward enters the consecrated fortress of St. Bertin
STC400808 How Hereward enters the consecrated fortress of St. Bertin, illustration from Hereward the Great by Charles Kingsley, pub. 1870, engraved by C.G

Background imageHereward The Exile Collection: Hereward informs his uncle the Prior that he is about to be outlawed

Hereward informs his uncle the Prior that he is about to be outlawed
STC400803 Hereward informs his uncle the Prior that he is about to be outlawed, illustration from Hereward the Great by Charles Kingsley, pub. 1870, engraved by C.G

Background imageHereward The Exile Collection: Martin Lightfoot undertakes to be the bearer of the letter to Earl Leofric

Martin Lightfoot undertakes to be the bearer of the letter to Earl Leofric
STC400801 Martin Lightfoot undertakes to be the bearer of the letter to Earl Leofric, illustration from Hereward the Great by Charles Kingsley, pub. 1870, engraved by C.G

Background imageHereward The Exile Collection: How Hereward came in to the King, illustration from Hereward the Great by Charles

How Hereward came in to the King, illustration from Hereward the Great by Charles
STC400818 How Hereward came in to the King, illustration from Hereward the Great by Charles Kingsley, pub. 1870, engraved by C.G

Background imageHereward The Exile Collection: How Hereward cleared Bourne of Frenchmen, illustration from Hereward the Great by Charles

How Hereward cleared Bourne of Frenchmen, illustration from Hereward the Great by Charles
STC400812 How Hereward cleared Bourne of Frenchmen, illustration from Hereward the Great by Charles Kingsley, pub. 1870, engraved by C.G

Background imageHereward The Exile Collection: How Hereward runs his ship upon the Flanders shore, illustration from Hereward the Great

How Hereward runs his ship upon the Flanders shore, illustration from Hereward the Great
STC400807 How Hereward runs his ship upon the Flanders shore, illustration from Hereward the Great by Charles Kingsley, pub. 1870, engraved by C.G

Background imageHereward The Exile Collection: How Hereward was caught in a trap, illustration from Hereward the Great by Charles

How Hereward was caught in a trap, illustration from Hereward the Great by Charles
STC400806 How Hereward was caught in a trap, illustration from Hereward the Great by Charles Kingsley, pub. 1870, engraved by C.G

Background imageHereward The Exile Collection: Hereward guards Alftruda to a place of safety, illustration from Hereward the Great by

Hereward guards Alftruda to a place of safety, illustration from Hereward the Great by
STC400815 Hereward guards Alftruda to a place of safety, illustration from Hereward the Great by Charles Kingsley, pub. 1870, engraved by C.G

Background imageHereward The Exile Collection: How Hereward rescues Alftruda, illustration from Hereward the Great by Charles Kingsley

How Hereward rescues Alftruda, illustration from Hereward the Great by Charles Kingsley
STC400814 How Hereward rescues Alftruda, illustration from Hereward the Great by Charles Kingsley, pub. 1870, engraved by C.G

Background imageHereward The Exile Collection: How Hereward slew the bear, illustration from Hereward the Great by Charles Kingsley, pub

How Hereward slew the bear, illustration from Hereward the Great by Charles Kingsley, pub
STC400805 How Hereward slew the bear, illustration from Hereward the Great by Charles Kingsley, pub. 1870, engraved by C.G

Background imageHereward The Exile Collection: Herewards interview with his mother and the priest Herluin

Herewards interview with his mother and the priest Herluin
STC400800 Herewards interview with his mother and the priest Herluin, illustration from Hereward the Great by Charles Kingsley, pub. 1870, engraved by C.G

Background imageHereward The Exile Collection: How Hereward turned Berserker, illustration from Hereward the Great by Charles Kingsley

How Hereward turned Berserker, illustration from Hereward the Great by Charles Kingsley
STC400810 How Hereward turned Berserker, illustration from Hereward the Great by Charles Kingsley, pub. 1870, engraved by C.G

Background imageHereward The Exile Collection: Herewards first interview with Torfrida, illustration from Hereward the Great by

Herewards first interview with Torfrida, illustration from Hereward the Great by
STC400809 Herewards first interview with Torfrida, illustration from Hereward the Great by Charles Kingsley, pub. 1870, engraved by C.G

Background imageHereward The Exile Collection: How Martin Lightfoot over-takes Hereward, illustration from Hereward the Great by Charles

How Martin Lightfoot over-takes Hereward, illustration from Hereward the Great by Charles
STC400804 How Martin Lightfoot over-takes Hereward, illustration from Hereward the Great by Charles Kingsley, pub. 1870, engraved by C.G

Background imageHereward The Exile Collection: Hereward sees Martin Lightfoot depart with the letter, illustration from Hereward

Hereward sees Martin Lightfoot depart with the letter, illustration from Hereward
STC400802 Hereward sees Martin Lightfoot depart with the letter, illustration from Hereward the Great by Charles Kingsley, pub. 1870, engraved by C.G


All Professionally Made to Order for Quick Shipping

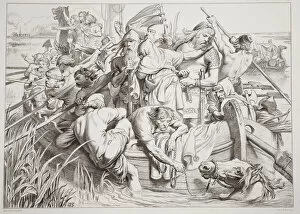
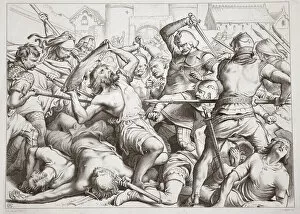
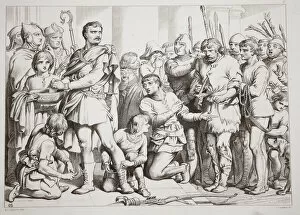
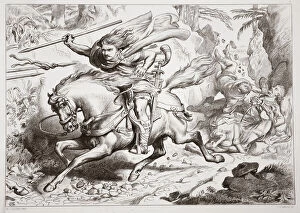
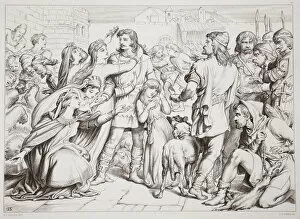
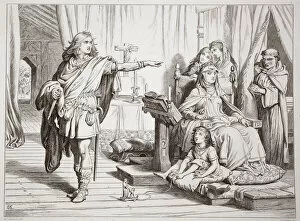
"Hereward the Exile: A Tale of Courage and Deception" In the epic saga of Hereward the Great, his remarkable journey unfolds with twists and turns that captivate our imagination. Departing from Ely, he embarks on a treacherous path to reclaim his honor and seek justice. With each step, he faces daunting challenges that test his mettle. One such moment is immortalized in Charles Kingsley's masterpiece. The vivid illustration depicts Hereward slaying Swallow, a mare symbolic of his defiance against oppression. This act showcases his unwavering determination to fight for what is right. As the story progresses, we witness Hereward's cunning nature come to light. In another gripping scene captured by C. G. Lewis' steel plate engraving, he secures the rest of his soul's price through shrewd tactics. His intellect proves as formidable as his sword arm. But it is not only through deceit that Hereward triumphs; he also learns valuable lessons along the way. Torfrida becomes an influential figure in teaching him how to find solace in prayer amidst turmoil and uncertainty. The narrative takes an unexpected turn when Alftruda recognizes Hereward—a revelation that adds complexity to their intertwined destinies. Their encounter sparks intrigue and sets in motion events that will shape their fates forever. Undeterred by danger, our hero fearlessly infiltrates St Bertin's consecrated fortress—an audacious feat depicted with breathtaking detail in yet another mesmerizing illustration. Amidst all these trials, familial bonds remain strong for Hereward as he confides in his uncle prior about impending outlawry—a heart-wrenching conversation etched into history by Kingsley's words. Martin Lightfoot emerges as a trusted ally who undertakes a perilous mission—delivering a crucial letter to Earl Leofric—their hopes pinned on this daring messenger who may hold the key to salvation.